THIS PAGE IS BEING UPDATED
AS WE GET NEW INFORMATION AND
QUESTIONS FROM READERS
We do not know how long this war will go on nor if the Northern front will expand into a full-fledged war. There is a lot of uncertainty in a situation like this and we tend to forget that the things we take for granted might not be there for us when we need it. You may not be able to depend on delivery services, internet, electricity or water supply. You have to be prepared to be self-reliant.
Traditional survival guides talk about the “Rule of Three”:
- 3 minutes without air
- 3 days without water
- 3 weeks without food
Below are suggestions on how to prepare for different scenarios. Everyone has to prepare the best they can and make sure that after this crisis is over, stay prepared for natural or manmade disasters.
There are many excellent videos and guides on preparing for a natural disaster from American and Canadian authorities. In addition, there are many useful guides for “preppers” who prepare for when the SHTF (shit hits the fan). Many of these guides offer excellent advice on food preparation, power, water and sanitation. We have included various links to different resources.
In a disaster, some utilities that you depend on might not be working. Will you have water, electricity, gas? If you live in a tall building, will your building be able to pump water to your floor? Since we can’t predict exactly what may unfold, these are some suggestions and resources for preparing for an emergency in Israel, where you will be staying at home.
It is important to remember to prepare in advance and not leave things till the last minute when other people are trying to do the same thing. Just after the ware started, people panicked and started a rush on supplies. If people simply buy extra food when they do their regular shopping, it is easy to accumulate the additional supplies needed for an emergency.
The city’s emergency-information brochure is currently available only in Hebrew. A version in English is being prepared.
The brochure lists public shelters, as well as pharmacies and grocery stores that are authorized to be open during an emergency.
The Quick Start Guide
Below is the quick start guide for prepping. Scroll down below and you will see more detailed suggestions.
We don’t want to test the limits of our ability to survive under adverse conditions, so here is a list of some of the things you should prepare:
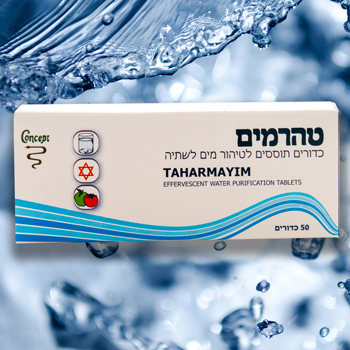
- Potable water: three liters per person per day (9 liters per person for three days). If you are concerned about an interrupted supply, consider buying Taharmayim water purification tablets, which are available from SuperPharm for about 50 NIS.
- Food that can be eaten “out of the can” and does not require refrigeration or cooking. Think of dried fruit, peanut butter and power bars.
- Flashlights (especially one with replaceable batteries).
- A radio that runs on batteries.
- Extra batteries for flashlights and radio.
- Extra medicines that you might be taking.
- Candles/matches/lighter.
- Hand sanitizer.
- Whistle.
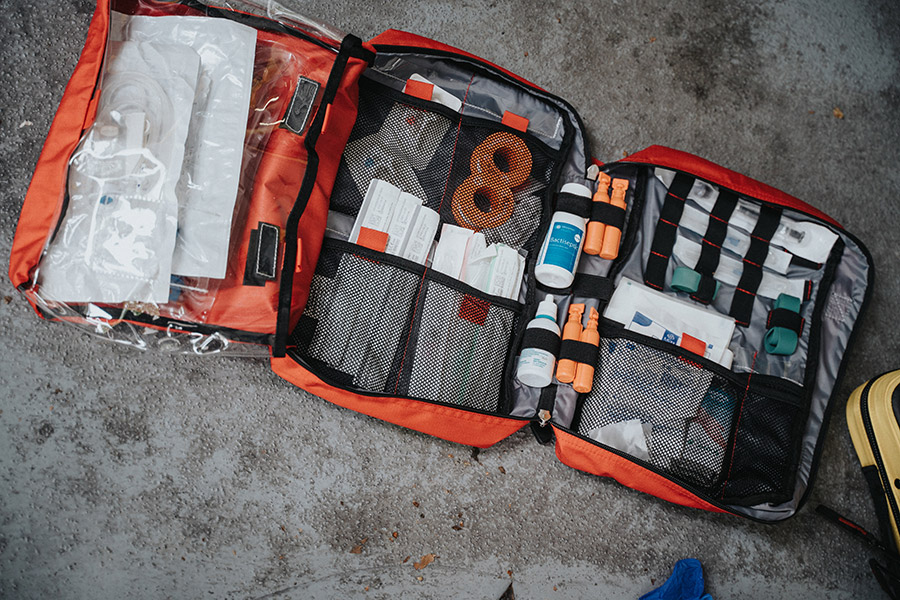
- First aid kit.
- Pocket knife or Leatherman type tool.
- Extra cash.
- IDs and other important documents in case you need to evacuate.
- If you have children, besides food, water, meds, diapers etc. consider a deck of cards and small games.
In case you have to move to another location, having a backpack ready to hold these items can be useful.
Check the Home Front Command website for additional information in English:
- https://www.oref.org.il/12766-en/Pakar.aspx
- Staying in a protected space
- Prepare for an emergency
- The Threats That May Disrupt Daily Life in Israel
- Family Emergency Plan
- Preparing for emergencies with all the required equipment
- Preparing the Home for Emergencies
- Who to Contact During an Emergency
- The Program That Prepares You for Emergencies Comes to Your Home
Let’s do a deep dive into preparing…
Some of the information below comes from Yanosh Kralik and other members of our preparedness WhatsApp group. Thank you to all for the great ideas!
We can break preparations into the following categories:
- Power
- Water
- Food
- Human waste
- Meds
- Security
Preparing for a disaster is a big unknown, because we have no idea what, if anything, will happen and when and in what form it comes. You will probably put away useless things that might come in handy and forget to put away things that were essential. You can’t prepare for every scenario. However, you might be able to imagine what life would be like if there was a major blackout or if your building became unsafe to live in. Thinking about it now, before it happens, affords you the ability to plan in advance and being able to buy or make the necessary things that will help you get through it.
POWER
OK, what would you do if the power went out? What is the first thing that you would pick up? If it is nighttime, you grab a flashlight or a candle and matches.
Keep flashlights ready in various parts of your house with fresh batteries in them. Make sure they are in easy to access places, where they can be reached without having to open cupboards or drawers. In an emergency, you don’t want to rummage through your kitchen junk drawer.
OK, now what? The power might be out for 5 minutes, 5 hours or 5 days. What do you do?
First, try and ascertain if the issue is just your apartment/building or a wider area. Is this a temporary outage or part of a larger issue. If it is your apartment only, check your electrical panel for any breakers that might have been tripped or the ground-fault circuit interrupter (GFCI). If it is the GFIC, and you turn it back on and it closes again, you might have a short someplace in your apartment.
If the issue is your building or the area, prepare for what could be an extended outage. Don’t open the fridge! If your power is out for an extended period, every time you open your fridge or freezer you shorten the time you can make sue of the food in it. See the section on food in a fridge.
Suggestions for power preparations
You need to do a power audit to determine, what is the least amount of power you would need if the power shuts down. There are many variables, and you will not be able to plan for every eventuality, but you can take steps to ensure you have some power to cover basics. We did an audit and determined that we would need:
- Charge a laptop
- Charge two phones
- Power a few LED lights
- Possibly charge or power some tools
We considered buying a generator to put on our balcony, but were concerned about the safety of having it emit fumes near us and neighbors. They are noisy and only last as long as you have fuel (and oil for some). They are expensive. In case of an emergency, you have a resource that others need.
Instead, we opted to install a single PV solar system. One 100 watt panel, a 100 Ahr battery, an MPPT charge controller and and a 350 watt inverter. The system can give us about four hours of power and can be charged as long as we have sun. We can also add a 220 v charger so that if we do have power, even for limited amounts of time, it could be recharged.
This system is not for newbies. There are prebuilt systems that come in a box that can do much of what we are doing with our system. Check out large hardware stores, especially ones that deal with tradespeople.
- Buy 48-hour GLASS Yarzheit candles. They are a good way to provide light in various parts of your home, but keep safety in mind, especially of you have young kids. Don’t forget the matches/lighters – lots of them.
- Make sure you a power bank for your phones. If there is phone service and no electricity, this might be one of the ways you can communicate and get news. Keep in mind that when there are large amounts of people using cell phones, they tend not to work.
- If you are a ham radio operator, get your kit out and prepare.
Discarding Food After a Power Outage
According to the CDC:
KEY POINTS
- After the loss of power, refrigerated or frozen foods may not be safe to eat.
- Keep refrigerator and freezer doors closed.
- Your refrigerator will keep food safe up to 4 hours without power.
- A full freezer will keep food safe for 48 hours and a half-full freezer will keep it safe for 24 hours.
- When in doubt, throw it out.
After the loss of power, refrigerated or frozen foods may not be safe to eat. Keep refrigerator and freezer doors closed. If you do, your refrigerator will keep food safe for up to 4 hours without power;
- a full freezer will keep food safe for 48 hours;
- a half-full freezer will keep it safe for 24 hours.
After 4 hours without power, throw out refrigerated foods like meat, fish, eggs, milk and leftovers.
- Throw out any food with an unusual color, odor, or texture.
- Never taste food to determine if it is safe to eat.
Read the article at: https://www.cdc.gov/natural-disasters/psa-toolkit/discarding-food-after-a-power-outage.html
FOOD
Getting groceries (national list) during wartime.
A post on the Israel Realtime Telegram channel says:
“IRON (GROCERY) STORES” – In case of war, select grocery stores have been designated to be assisted by Home Front Command to continue to operate. Here’s the list (Hebrew only) -> https://www.gov.il/BlobFolder/news/iron-branches-140424/he/barzel_iron-branches-280724.pdf – review and know your nearest guaranteed grocery, just in case.
Suggestions for food preparations
Emergency Water and Food Storage List and Recipe:
This is for Set-it-And-Forget-it type of emergency preparedness.
You will want to also store food that does not require cooking, like canned tuna, sardines, canned fruits, canned veggies, canned milk/power milk, peanut butter, dry cereal, rice cakes, crackers, granola bars.
Sample food list from a TV report on government food supplies
In the box:
- Crackers
- Oats
- Halva
- Tehina
- Black coffee
- Tuna
- Dates
- Chickpeas (canned)
- Corn (canned)
- Beans (canned)
- Peas (canned)
- Peas & Carrots (canned)
- Mushrooms (canned)
- Cubed tomatoes (canned)
- Walnuts
- Bulgar
- Ramen noodles / Mana Chama
- Sugar
- Petit Beurre cookies
- Tea
Added separately:
- Long-life milk (“Halav Amid”)
- Bread
- Baby food (if needed)
- And don’t forget water and toilet paper.
Sample Recipe
- 4-5 Liters water
- 8oz rice
- 2oz lentils
- 1oz split green
- 1oz chickpeas
Add water, bring to simmer, let it cook for 2 hours.
Makes enough to last 2 days for 4 people.
Overnight Oats with Water
The people at Conscious Plant Kitchen have come up with a recipe for making oats without the need to cook. It does however require refrigeration.
The recipe involves mixing rolled oats or quick-cooking oats chia seeds, cinnamon, maple syrup, vanilla extract and water. Check out their website and full recipe.
WATER
Water is one of the most essential items that you need in case there is a disaster.
Suggestions for water preparations
The suggested amount of water storage is a minimum of three liters per person per day. But this number does not take into account the extreme heat of the Israeli climate and assumes the user is frugal with the water usage.
- Buy bottled water, which you can leave in your Mamad.
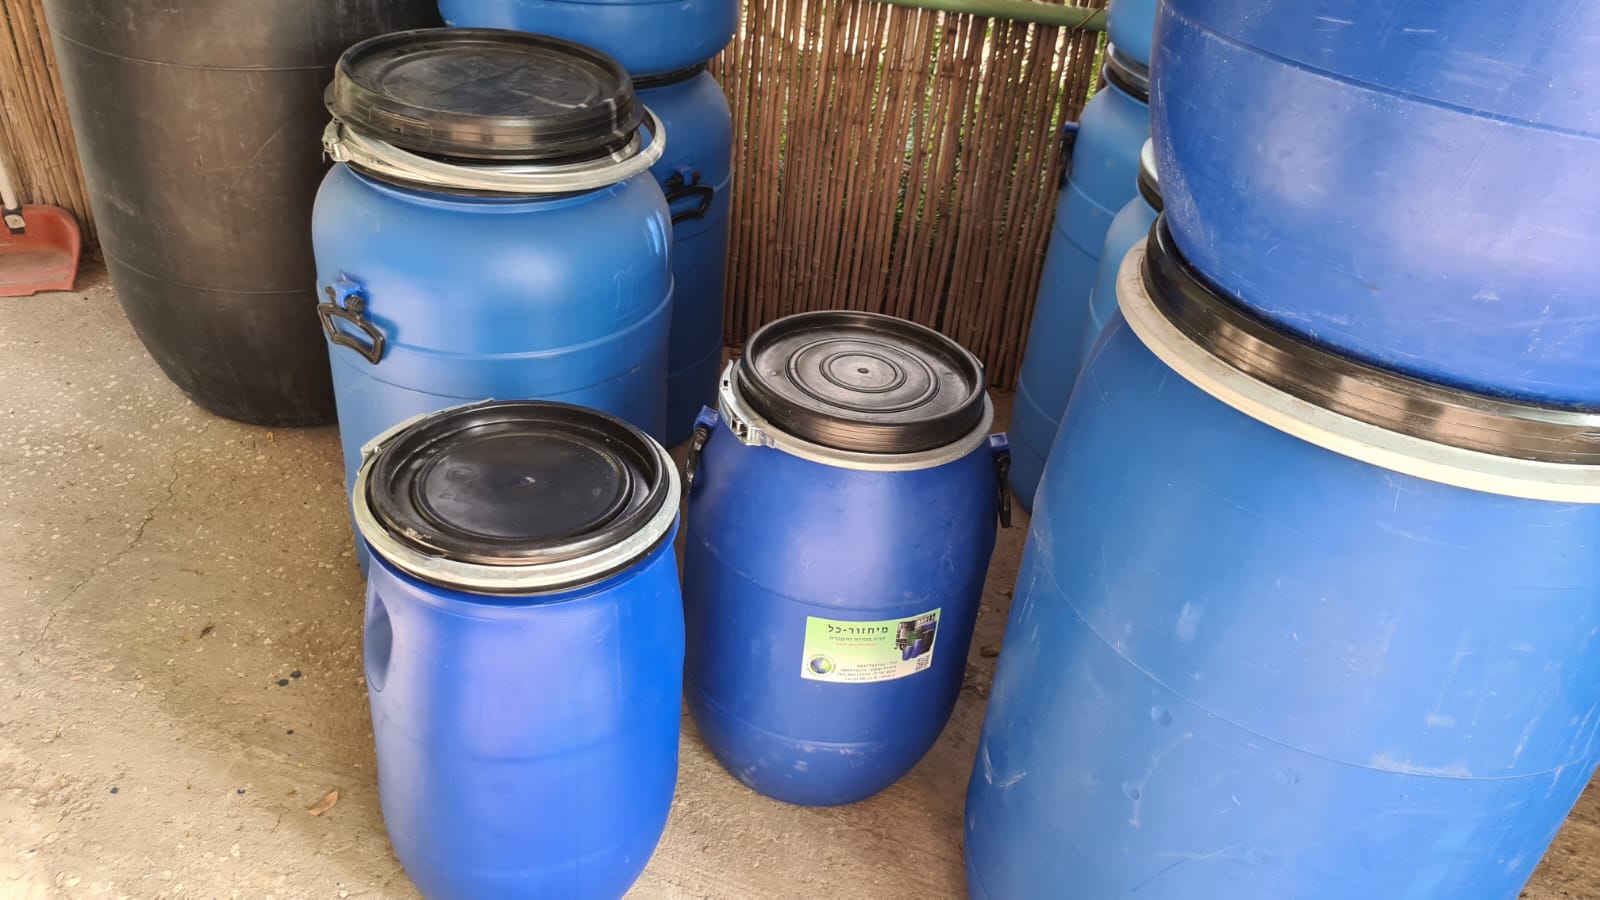
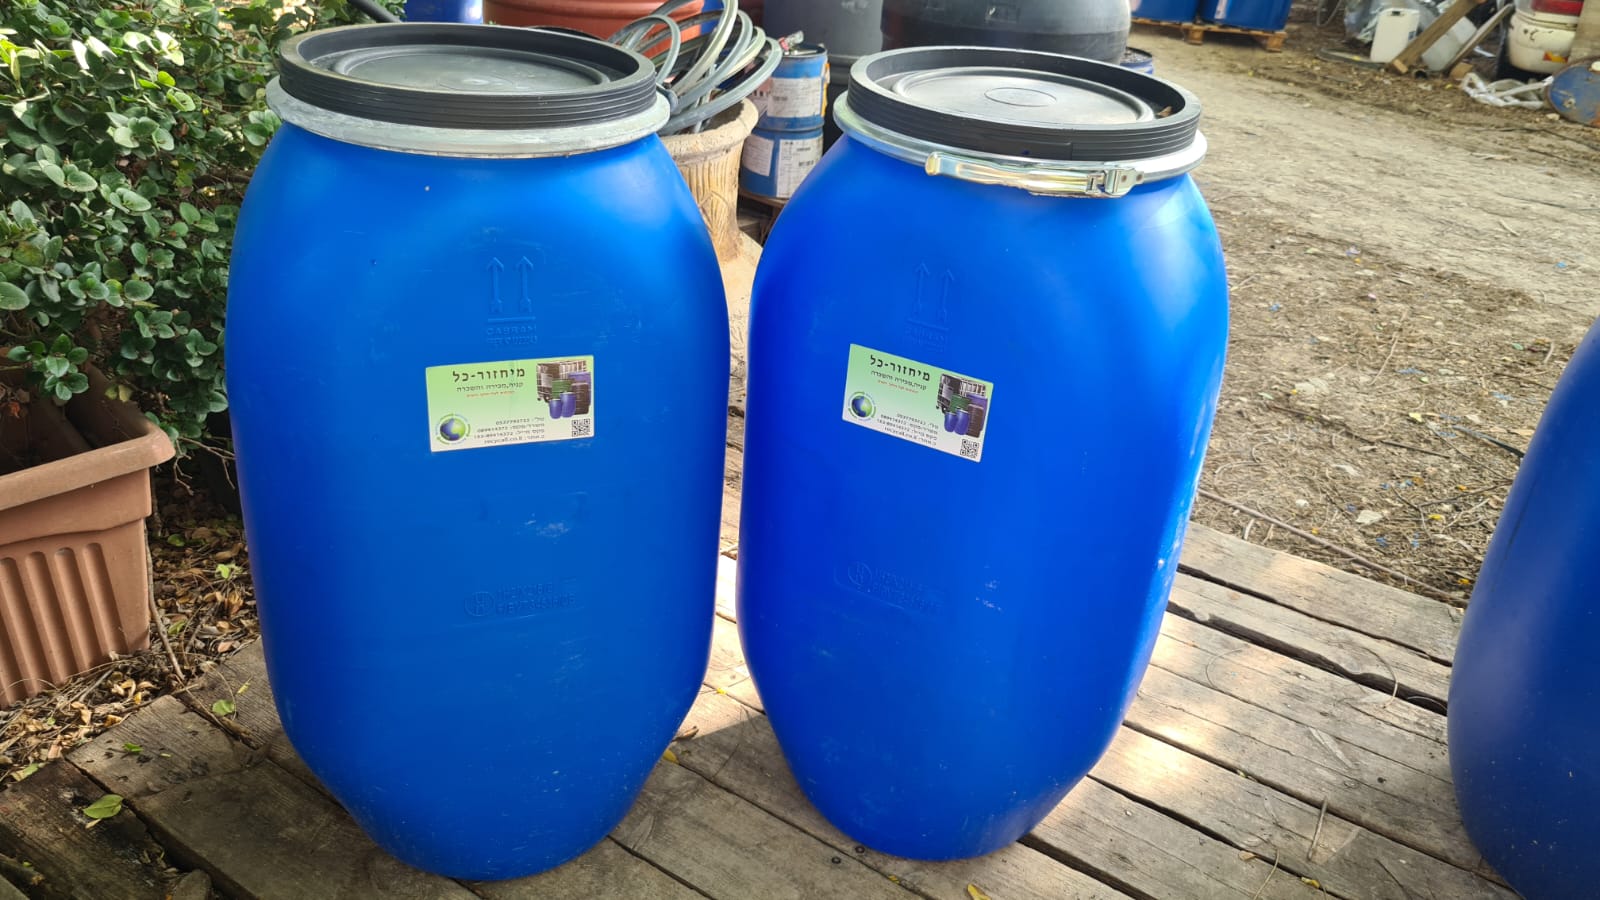
- If you have the room, consider buying a large blue barrel and filling it with tap water. They are available in 30, 60, 120 liter sizes.
- You can store water in your bathtub for cleaning purposes. Do not do this if you have children at home.
- When storing large amounts of water, you want to ensure it stays clean. Taharmayim is an Israeli chlorine water purification tablet that is used by the IDF and armies around the world. You can use it to treat the water in your blue bin. You can buy it at many SuperPharm locations and it sells for about 50 NIS for a box of 50 tablets. Follow the instructions carefully.
According to the CDC: After an emergency, especially after flooding, drinking water may not be available or safe to drink for personal use. As a result, residents may have to find a source of safe drinking water or know how to treat their water for use in certain activities, such as drinking, making ice, washing hands, and brushing teeth. Also, during and after an emergency, the regular flow of goods, water and food may be disrupted.
In a recent CDC study, the detection of E. coli in over half of filter backwash samples indicates that swimmers frequently introduced fecal material into pools and thus might transmit infectious pathogens to others. The risk for transmission and recreational water illness (RWI) increases if swimmers introduce feces when ill with diarrhea. In addition to minimizing the amount of fecal material introduced into recreational water, Nitrogen in urine and sweat depletes free chlorine by combining with it to form di- and tri-chloramines, which are volatile respiratory and ocular irritants; free chlorine alone, at CDC-recommended concentrations, is not an ocular irritant. This study and others indicate that swimmers frequently introduce fecal material, microbes, urine, sweat, and other contaminants into recreational water. Another study suggests that disinfectant level and pH frequently are not properly maintained.
Follow the instructions from the manufacturer. If you are using Taharmayim, you can do either, but if you are storing for many years, you might want to use the water purification tablets before you drink the water. Every situation is different and the use will depend on the quality of the water, how it is stored and for how long.
HUMAN WASTE
If water is not flowing, your toilets will not flush. If after you relieve yourself, you dump water down the toilet, the waste should be washed out, as long as your system is working properly. But, there are alternatives to consider that do not use precious water resources.
Sanitation and Hygiene
Any conversation about human waste requires a mention about sanitation and hygiene.
According to the CDC: “Good personal hygiene and handwashing are critical to help prevent the spread of illness and disease. Sanitation and hygiene become especially important during an emergency, such as a natural disaster, when finding clean, safe water could be difficult.”
Keep hands clean to help prevent the spread of germs. During a boil water advisory or do not drink water advisory, it may be safe to wash hands with tap water. If local authorities or your doctor recommend extra caution, wash your hands with soap and water that has been boiled or disinfected.
- Wash your hands with soap and water for at least 20 seconds, especially during key times when you are most likely to spread germs. Follow CDC’s five easy steps to make sure you are washing your hands the right way.
- If clean tap water is not available, create a temporary handwashing station by using a large water jug.
- If you do not have soap and water use an alcohol-based hand sanitizer that contains at least 60% alcohol.
Alcohol-based hand sanitizers can quickly reduce the number of germs on hands in some situations, but sanitizers do not eliminate all types of germs and might not remove harmful chemicals. Hand sanitizers are not as effective when hands are visibly dirty or greasy.
Suggestions for human waste preparations
- Plastic bag in the toilet
- Two bucket approach
Plastic bag in the toilet
This method can work if you have two toilets, one for pee, the second for poo. It is not as effective as the twin-bucket approach.
- Drain your toilet.
- Put a thick plastic bag over the toilet bowl to line it. Make sure the edges go over the edges of the toilet, so the bag does not go into the drain.
- After using it, place kitty litter to cover feces and water + bleach for the urine bowl. Do not let the bags get too full.
From Cityprepping.com https://cityprepping.com/blog/videos/how-to-dispose-of-human-waste-after-disasters/
How to set up a twin-bucket toilet system
- Get two 5-gallon buckets. Home improvement stores or bakeries are great places to find inexpensive buckets or even free, used buckets.
- Mark the buckets “pee” and “poo” (or #1 and #2, or urine and feces). Check out these ready-made labels. Many city and county emergency management departments are printing the labels on adhesive vinyl stickers so they are waterproof and easy to affix to the buckets.
- The pee bucket can remain unlined. The poo bucket should be lined with a heavy-duty 13-gallon black plastic garbage bag. Heavy-duty bags are often called “contractor” bags and have a thickness of 3–5 mil. (Note: Mil will be referred to on the packaging of the bags.)
- Purchase or make a seat. Most camping/outdoor sections of stores carry the seat/lid combos. A pool noodle cut in half and then sliced down the long side can be attached to the top of the bucket for some padding in absence of a seat. The seat can be moved from one bucket to the other.
- Purchase toilet paper (RV toilet paper breaks down the best), plastic garbage bags, disposable gloves and the carbon material (wood shavings, sawdust, shredded paper, bark chips or peat moss). Store those items inside the buckets. Keep these stored and ready until you need to use them.
How to use a twin-bucket toilet system
- Set up the buckets in a private space. This could be an existing bathroom if space allows or elsewhere indoors or outdoors with a privacy screen or curtain.
- Try not to pee in the poo bucket. This is really important because the pee is the component that produces the strong smell in toilets that mix.
- After using the pee bucket, place toilet paper in either the poo bag or a separate plastic bag rather than dropping it in the pee bucket. This ensures that you can easily dump out the pee later on. Remove the seat and cover with a lid that closes well.
- After using the poo bucket, sprinkle about a half cup of carbon material (wood shavings, sawdust, shredded paper, bark chips or peat moss) so that it completely covers the surface of the poo. This will eliminate odors and ensure flies do not make themselves at home. Flies can carry germs and spores of feces to human food and open water sources. If you collect toilet paper separately in a plastic bag, it is easier to be sure the poo is completely covered.
- Put the toilet seat back down, ensuring it’s not airtight. Give your poo some air and it will dry out and reduce in volume.
Disposal of waste from a twin-bucket system
- When the pee bucket is roughly one-quarter full or before it becomes too heavy to safely carry, add some water to the contents if possible to dilute the urine and simply pour on the lawn or ground. Try to change locations each time so the chemicals in the urine don’t damage the ground.
- Fill poo bucket no more than half-full of waste. When ready to empty, put on disposable gloves, double-bag the waste, tightly seal or close, and store separately from other garbage and far away from your food and water. A dedicated and separate garbage can or roll cart is a good option for storing waste. Secure waste from pets, flies and rats. Reline the bucket with the heavy-duty bags for continued use. If you live in a more rural area, consider digging a latrine or hole and burying the poo. Do not bury waste within 100 feet of a water source or where the contaminants can leach downhill into a water source.
- You will likely have to store the waste until the public sanitary system is fixed. Do not put human waste into the normal garbage. It has to be specially treated and should not go in a landfill with other household waste.
From the Oregon State University Extension Catalog.
RESOURCES
This is an excellent video on human waste disposal.
The Emergency Toilet Project
From The Regional Disaster Preparedness Organization (RDPO)
After a disaster, we may need to know how to live without running water and working toilets for weeks or months. Diseases like cholera can spread when human feces (poo) are not handled and stored safely. Read our guidebook to learn about safe post-disaster toileting options.
The Regional Disaster Preparedness Organization (RDPO) created the Emergency Toilet Project to provide information to the public about how to stay healthy after a disaster. Funding was provided, in part, by the Urban Areas Security Initiative grant program through the U.S. Department of Homeland Security. See below for information about proper source attribution.
https://docs.google.com/document/d/1Pt4W2ul_nfBeES0-aI38SFGN9_5-rCDcV45lbfvligA/edit
